Photography vs. Scanning:
Which is Best for You?
Have you ever wondered how some artists get such beautiful prints from their artwork? It all starts with creating a high-resolution digital reproduction of your original piece. Digital images make your work accessible, professional, and easy to market or share.
There are two roads you can take to get stunning images of your artwork—photographic capture and flatbed scanning. In this post we’ll cover the basic differences between the two methods, common pitfalls you might face, and which is ultimately best for you.
What’s the Difference Between Scanning and Photography?
First, let’s look at some basic differences between how cameras and scanners digitize your artwork.
Compact Camera
Fully automatic point-and-shoot cameras you can slip in your pocket. While compacts have improved in recent years, their small sensors make capturing fine detail difficult, even with the most recent iPhone. Best for travel or informal studio shots.
Single-Shot Professional Camera (DSLR)
A single high-resolution camera lens captures your artwork from one point. Though large sensors and manual controls allow for higher resolution with less grain, DSLRs can be costly, time-consuming, and complex. The array of settings and features can be overwhelming for a beginner. Best for those with technical skill or who need special directional lighting for 3D works.
Desktop Scanners
Desktop scanners are sometimes used for small pieces, though the quality of the camera tends to vary. Manufacturers often claim they’re capable of capturing a higher resolution than is possible for a small device. Best for scanning documents and other ancillary materials to your portfolio.
Drum Scanners
A drum scanner is a special type of high-end scanner mainly used for large format photography. The film is wet mounted to and inserted into the scanner via a cylindrical “drum.” The drum then rotates at high speed while the scanner captures each part of the film, pixel by pixel. (Chica Prints does not offer drum scanning, preferring to use large, flatbed scanners instead. See entry below).
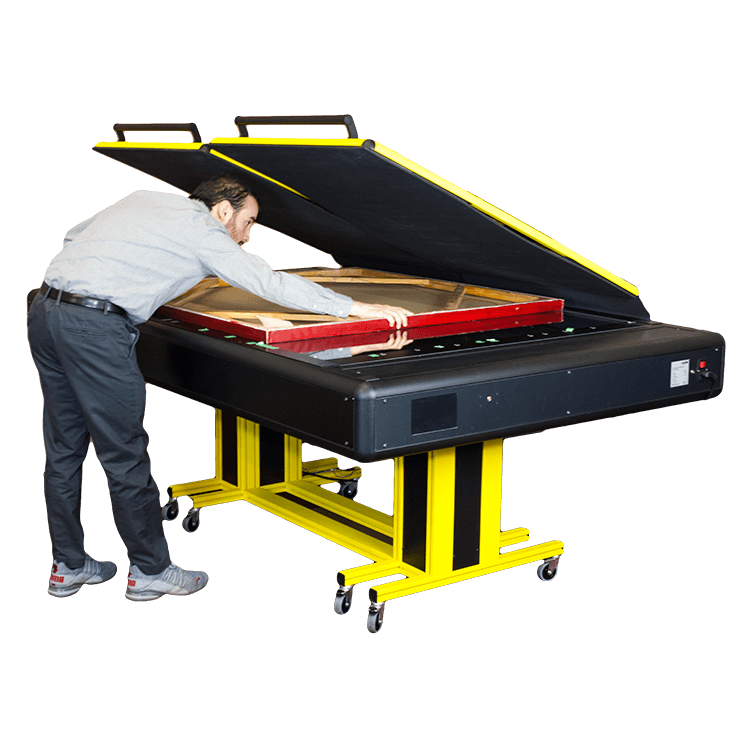
High-Resolution Flatbed Scanners
High-resolution cameras scroll every inch of your artwork at close range, accurately capturing every subtle detail, texture and color of your artwork. Large sensors produce the highest resolution available. Aspect ratio and color management are tightly controlled. Best for those who use unusual material or want a done-for-you approach.
Photography vs. Scanning: How to Choose the Best Method
Choosing the right method to digitize your art is a personal choice that requires a close look at your resources and the needs of your artwork. You’ll want to think about practical concerns, like time, budget and skill level, as well as long-term goals for your portfolio.
Here are five issues that might come up.
Size and Dimension
Professional flatbed scanner sizes tend to vary, so you’ll want to check that the height and width of your piece will fit the scanner. Our scanner fits artwork up to 48” x 70” (that’s 4 x 5 ⅚ feet).Larger pieces are scanned several times, then “stitched together seamlessly in Photoshop.
Artwork should also be 2D and reasonably flat enough to scan. Good examples include unframed paintings on canvas, drawings on paper, prints and engravings on metal and wood. 3D works (i.e. sculptures and installations) aren’t suitable for scanning, and should be photographed or filmed instead.
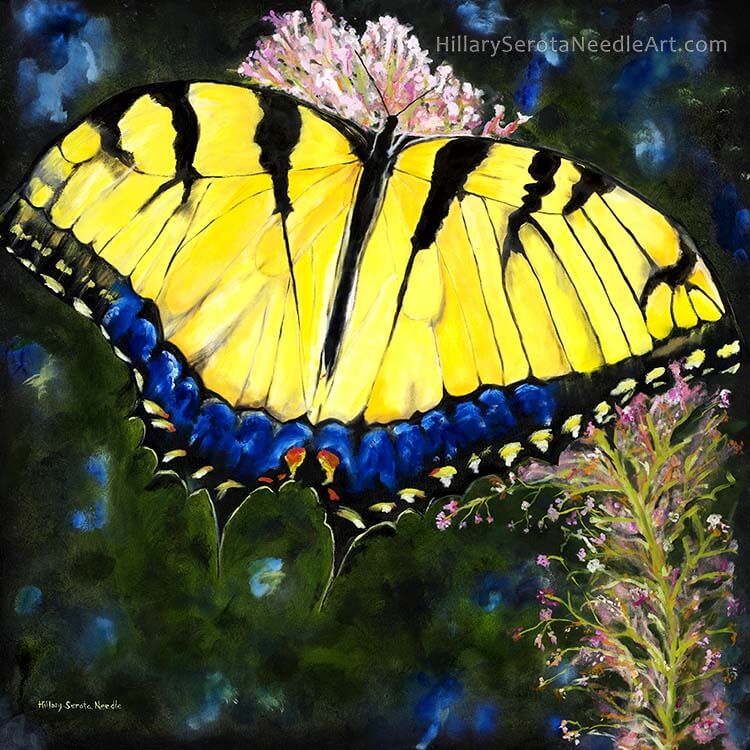
Art By: Hillary Serota Needle @hillaryserotaneedleart
Materials
Scanning is a great option if you’re an artist who works with fine or unusual materials. You can use a professional (DSLR) camera to capture fine details in cloth, wood, or metal, but you’ll need to zoom in and take lots of small shots, then “stitch” the whole thing together in Photoshop. It’s doable, but it takes time and expertise. Our scanner performs a similar, automated process for larger artworks with lots of fine detail. It’s quick, seamless, and fool-proof.
Chica Prints can scan any of the following materials (up to 48”x 70”):
- Mounted canvas
- Fragile artwork
- Delicate fabrics
- Quilted cloth
- Varnished metal
- Engraved wood
Contact us here if your work is larger than 48” x 70”, or don’t see your medium or material on the list.
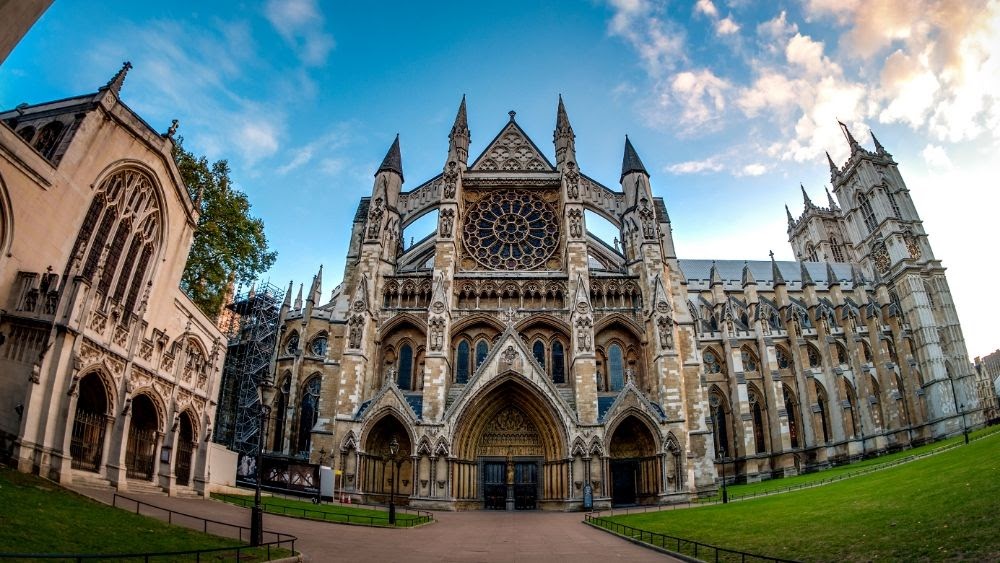
[The curved lines in the photo are an extreme example of lens distortion produced by a wide angle lens]
Technical Know-How
Even under the best circumstances, great photography requires a little technical know-how. When painter Beatrice Barkin started documenting her work, she noticed the straight lines of her canvas appeared curved in the final photo.
“I’ve had problems trying to photograph my work because it always comes out distorted, even if I steady the work and bring a tripod for the camera,” she says. “I know it’s distorted, otherwise it would be a perfect square.”
When straight lines appear curved in a photo, it’s caused by “lens distortion” (see above photo). It’s a common problem that can stem either from poor quality equipment or wide-angle lenses.
Here’s how to solve that problem, plus a few more to watch out for:
Lens Distortion
Occurs when straight lines become curved in an image. Lens distortion is common with wide-angle photography, and can be corrected by experimenting with different camera lenses and settings. Using a flatbed scanner eliminates lens distortion, giving your images straight lines every time.
Bad Lighting
Digitizing artwork requires good lighting, whether you’re scanning or photographing. Lighting a studio properly requires professional lighting and proper set up. Scanners use consistent, even lighting that avoids patchy or shadowy areas. Photography can be used when the piece needs special directional lighting, but many scanners (ours included!) have directional lighting that can be adjusted based on request.
Temperature, Color, and White Balance Fluctuations
In photography, the color accuracy of your artwork depends on the temperature of artificial or natural light you use to illuminate it. For example, standard household bulbs will yellow your artwork; light from electronics can turn it blue. You can avoid this by calibrating the white balance (WB) and color balance on your digital camera for each new project. In comparison, scanners are calibrated regularly for consistently. Our scanner is calibrated monthly to give your artwork a (harmless) blast of evenly distributed pure white light. The color temperature is neither too yellow or too blue—it’s just right.
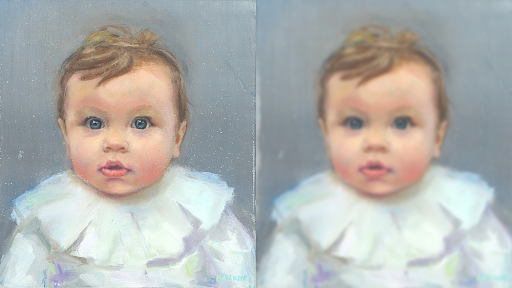
Beatrice Barkin’s oil painting ‘Rocky,’ digitized in high and low resolutions
Image Resolution
Resolution is, in simple terms, the amount of detail an image holds. The higher the resolution, the more details and definition the image will have. An image with low resolution lacks fine detail and sharp focus.
So what makes for a high-resolution image? How do you avoid low resolution? Let’s start by clearing up a common misconception surrounding the terms DPI (Dots Per Inch) and PPI (Pixels Per Inch). The terms are often confused or used interchangeably, and though they both define the general resolution of the image, they do it in separate realms: print and digital.
DPI: The dots per inch of a printed image. Reserved for physical, printed images. When you see a digital image labeled with 72, 300 or 600 DPI, this refers to the resolution of the image when it’s printed. It does not describe the resolution of the digital image.
PPI: The resolution in pixels of a digital image. Reserved for screens and digital formats.
Digitizing artwork at 72 DPI is standard for web images, but it won’t produce a high enough resolution for print. Artwork should always be digitized at a minimum of 300 DPI, which most professional cameras allow.
If you find 300 DPI doesn’t produce the detail you’re looking for, scanning is a good option. Our flatbed scanner features four 600 DPI cameras that capture artwork as large as 48” x 70” (or 28,800 px x 42,000 px). Each camera zooms into the artwork, capturing brushstrokes and even the texture of the canvas.
How Much Time Do I Have?
Consider your deadlines. Are you updating your portfolio for a grant? Applying for a group show? Archiving your work before a big sale? Time is an important element in the digitizing process, and you’ll want to leave enough time to do it right.
If you’re going with photography, make a list of all the materials and equipment you need for a professional shoot: a decent camera with manual settings, lights and light stands, a tripod, and editing software are a good start (here’s a more complete list).
With scanning, you won’t need to worry about organizing your own shoot. Our scanner is calibrated weekly, which means production times are quick. As long as you make an appointment, we can scan, upload, and deliver high-resolution images of your artwork all on the same day.
Cost
Cost depends quite a bit on your experience with photography, what equipment you already have on hand, and how big your work is. Professional photography equipment is on the expensive side and hiring an experienced photographer can cost quite a bit, too. The cost of quality scanning can vary depending on shipping and size. Request a quote here.
Bottom line: digitizing your artwork, when done correctly, is an investment that can save you tons of time, money and embarrassment down the road.
Need your artwork scanned? Contact us for quotes and more information.
Share This Story


Error: API requests are being delayed for this account. New posts will not be retrieved.
Log in as an administrator and view the Instagram Feed settings page for more details.


Follow us on Social Media


